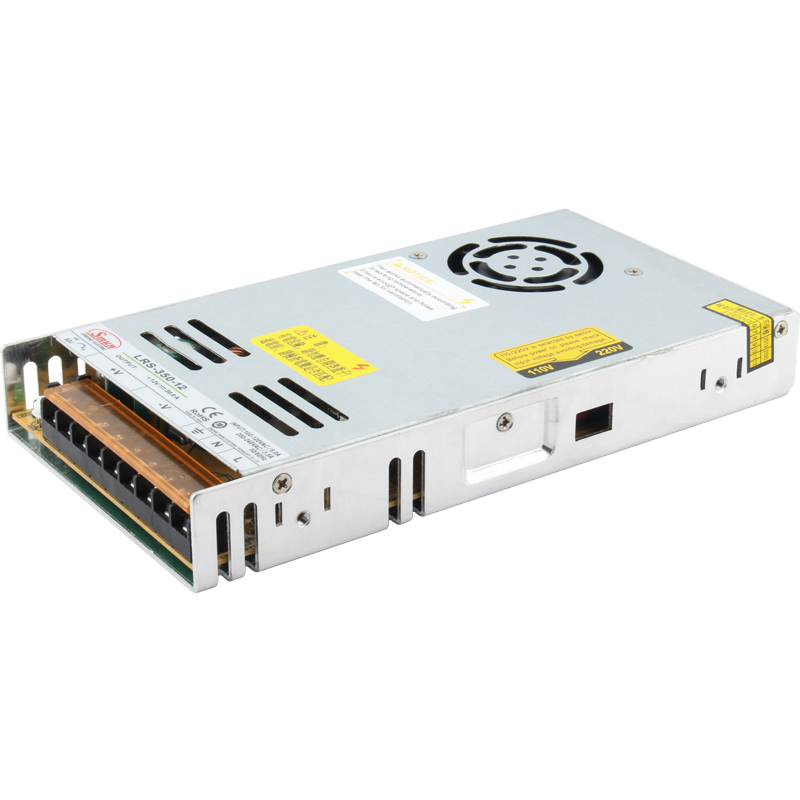
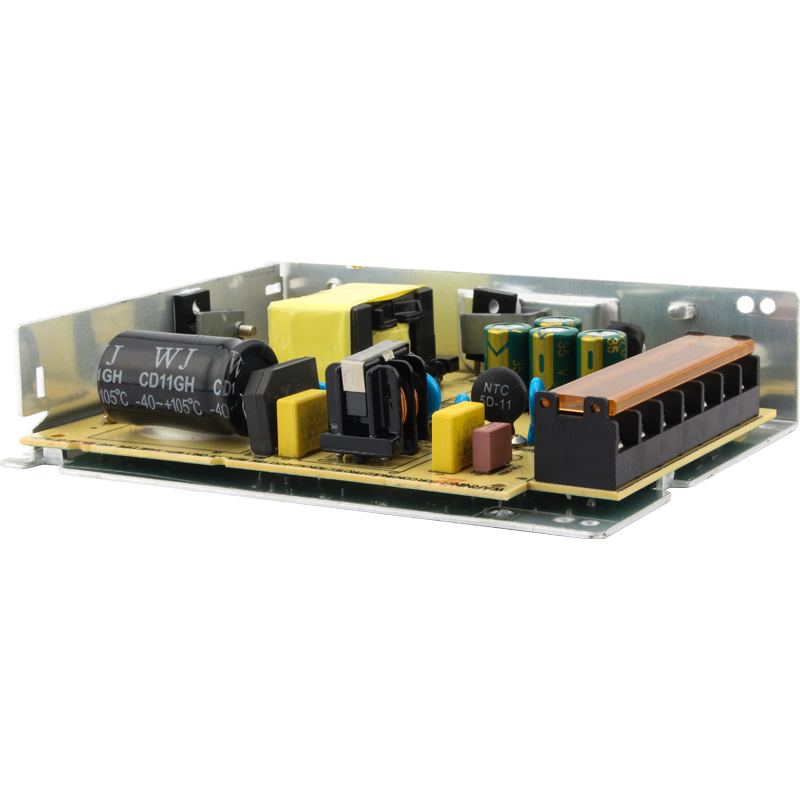
LED drivers are essential components in every LED lighting system, regulating power for optimal performance. When these drivers fail, they can cause dimming, flickering, or even complete failure of your lights. Identifying a bad LED driver early can prevent costly repairs and safety issues. In this post, we’ll discuss how to tell if your LED driver is bad and walk you through troubleshooting steps to fix the issue.

What is an LED Driver and How Does It Work?
What is an LED Driver?
An LED driver is a device that regulates power to LED lights. Unlike regular power supplies, an LED driver ensures that the correct voltage and current are supplied to the LEDs. It maintains the efficiency and safety of the lighting system by converting the incoming power to match the needs of the LED lights.
LED drivers are crucial for the proper functioning of LEDs. Without them, LEDs would not perform as intended, leading to inconsistent lighting or even failure.
Types of LED Drivers
There are two main types of LED drivers: constant current and constant voltage drivers.
Constant Current Drivers: These drivers regulate the amount of current flowing to the LEDs. They are best for LEDs that require a specific current to operate correctly, such as high-power or specialty LEDs.
Constant Voltage Drivers: These maintain a steady voltage level and are used for LEDs that require a specific voltage. They are ideal for low-voltage LED systems, like strip lights.
Understanding which type of driver is suitable for your LED setup is crucial to ensure proper performance.
How Does an LED Driver Work?
LED drivers work by regulating the voltage and current supplied to the LEDs. They convert the incoming power to match the specific requirements of the LED, ensuring it gets the right amount of energy for optimal performance.
Voltage Regulation: LED drivers convert high-voltage AC power to the low-voltage DC power needed for LEDs.
Current Regulation: They also ensure that the right amount of current flows through the LED, which is essential for consistent brightness.
It’s important to match the output of the LED driver to the LED’s power requirements. If the driver doesn’t supply the correct voltage or current, the LED may flicker, dim, or even burn out prematurely.
Common Signs Your LED Driver is Failing
Flickering or Dimming Lights
Flickering or dimming lights are among the most common signs of a failing LED driver. When the driver can't maintain a consistent power supply, the lights will either flicker or appear dim. This happens because the driver is not regulating voltage or current properly.
For example, if you're using dimmable LEDs, the lights may not respond correctly to dimming settings. If you notice flickering during normal use or when dimming the lights, it's time to check the driver.
Overheating LED Driver
An LED driver that becomes too hot is a serious red flag. Overheating can occur due to internal malfunctions, overloading, or poor ventilation.
To check for overheating, carefully feel the driver’s casing. If it's excessively hot to the touch, it could be damaged or working inefficiently. Look for signs like melted or scorched casing. Overheating can damage both the driver and the LED system, leading to failure.
Unusual Noises (Buzzing or Humming)
Buzzing or humming sounds coming from your LED system may indicate a malfunctioning driver. These noises are often caused by electrical arcing or stressed internal components.
When a driver begins to fail, its internal parts may produce vibrations or irregular currents, leading to these strange sounds. If you hear any noise, it’s a sign that something's wrong.
Loose or Damaged Connections
Loose, corroded, or broken connections can disrupt the power flow to your LED lights. This results in flickering, irregular lighting, or the lights not turning on at all.
Inspect the wiring and connections closely. If you see any frayed wires or signs of corrosion, fix or replace the damaged components. Tighten any loose connections to restore proper functionality.
Unexpected Shutdowns or Power Cuts
If your LED system suddenly shuts down or loses power, this could be a sign of overheating or internal failure in the driver. Some drivers have built-in protection that automatically shuts off power to prevent further damage when they overheat.
When this happens, the driver is trying to protect both itself and the LED system. It's crucial to address the issue quickly to avoid permanent damage to your lights.

How to Test and Troubleshoot a Bad LED Driver
Visual Inspection
Start by visually inspecting the LED driver and its connections. Look for obvious signs of wear, burning, or damage.
Check for:
Burn Marks: Any discoloration or burn marks on the driver or wires suggests overheating.
Melted Wires: If the wires are soft or melted, the driver may have overheated.
Swollen Capacitors: Swollen or leaking capacitors indicate internal damage.
Corrosion: Corroded parts, especially in outdoor or humid environments, can lead to failures.
A simple visual check can reveal many problems that are easy to spot.
Measuring Voltage and Current with a Multimeter
Using a multimeter, you can measure the voltage and current output of the LED driver. Here's a step-by-step guide:
Set up the Multimeter: Set your multimeter to measure DC voltage for most LED drivers. For current, switch to the amp setting.
Measure Voltage: Place the multimeter probes on the output terminals of the driver. Compare the reading with the driver’s specification.
Measure Current: If necessary, measure the current using the amp setting to ensure it's within the LED’s required range.
If the voltage or current readings don’t match the driver’s specifications, it’s a sign that the driver may be malfunctioning.
Component Testing
Testing key internal components can help identify specific driver issues. These components include capacitors, diodes, and transistors.
Capacitors: Use a multimeter to check the capacitance. If the readings are off, replace the capacitor.
Diodes and Transistors: Check for shorts or open circuits using the diode test mode on your multimeter. Faulty components here can cause the driver to malfunction.
Make sure to test these parts individually for a more thorough diagnosis.
Checking for Short Circuits or Faulty Components
Short circuits or damaged components are common issues in failing drivers. To check for a short circuit:
Turn Off Power: Always ensure the driver is not powered when testing.
Check Resistance: Use a multimeter to measure the resistance across the output terminals. A very low reading (close to zero) suggests a short circuit.
Inspect Components: Look for burnt or damaged parts that may cause shorts.
Short circuits can prevent your LED lights from working properly, so checking for them is crucial.

What to Do If Your LED Driver is Bad?
Replacing the LED Driver
If your LED driver is beyond repair, replacing it is the best option. Here’s how to replace a faulty driver safely:
Turn off the Power: First, disconnect the power at the circuit breaker to avoid electrical shock.
Remove the Old Driver:
Open the light fixture or access panel.
Disconnect the driver from the wires. Take a photo of the wiring setup for reference.
Unscrew and carefully remove the old driver.
Install the New Driver:
Ensure the new driver matches the specifications of your LED lights, such as voltage and current.
Connect the wires to the new driver, securing them with wire nuts or appropriate connectors.
Mount the new driver in place, using screws or clips.
Test the New Setup: Reconnect the power and test the LED lights. Check for smooth operation and correct brightness.
Choosing a driver that matches your LED’s specifications is crucial for proper performance.
Consider Professional Help
If you’re unsure about replacing the driver yourself, consider hiring a professional. Here’s when to call in an expert:
Complex Wiring: If the wiring looks complicated or confusing.
Electrical Safety: Professionals ensure the installation follows safety codes.
Driver Repair: They can assess whether the driver can be repaired or if a full replacement is necessary.
Professional services also help ensure the system operates correctly and safely after installation.
Alternative Fixes for Specific Issues
In some cases, you may not need to replace the entire LED driver. Here are some alternative fixes:
Fix Loose Connections: If the issue is with loose or corroded connections, tightening or replacing the connectors may solve the problem.
Adjust Settings: For dimming issues, try adjusting the settings or replacing a faulty dimmer switch.
Warranty or Repair: If the driver is under warranty, contact the manufacturer for repairs or replacement.
If you can fix the issue without replacing the driver, it saves both time and money.
How to Prevent LED Driver Failure and Extend Its Lifespan
Proper Installation and Maintenance
Installing your LED driver correctly is crucial for its longevity. Here are some tips:
Correct Placement: Ensure the driver is installed in a well-ventilated area to prevent overheating.
Avoid Blocking Vents: Don’t block any air vents or airflow paths around the driver.
Keep it Clean: Dust and dirt can accumulate and cause overheating. Clean the driver and connections regularly.
Check Connections: Make sure all connections are tight and secure. Loose connections can lead to flickering or power loss.
Regular checks and maintenance help ensure the driver works smoothly for years.
Choosing a High-Quality LED Driver
When selecting an LED driver, look for a reliable and high-quality option. Here’s what to consider:
Specifications: Make sure the driver matches the required voltage and current for your LED lights.
Certifications: Check for certifications like UL or CE. These ensure the driver meets safety standards.
Brand Reputation: Investing in a reputable brand can prevent failure issues down the road.
A high-quality driver will last longer and prevent common issues like overheating or flickering.
Avoid Overloading the Driver
Overloading an LED driver is one of the quickest ways to damage it. Here’s how to avoid overloading:
Match Power Requirements: Ensure the driver’s wattage capacity matches the total wattage of your LEDs.
Don’t Exceed Ratings: Never connect more LEDs than the driver is designed to handle. This can lead to overheating or failure.
Use the Right Driver: Always choose a driver that meets your system’s needs, considering both voltage and current.
Properly sizing the driver for your lighting system will help prevent early failure and ensure consistent performance.
Conclusion
To identify a bad LED driver, perform a visual inspection, use testing tools, and troubleshoot effectively. Regular maintenance is essential to keep your lighting system working smoothly. If the driver fails, replace it promptly to ensure safety and maintain efficient lighting.
FAQs
Q: How long do LED drivers typically last?
A: The lifespan of an LED driver typically ranges from 25,000 to 50,000 hours, depending on factors like quality, usage conditions, and proper installation. Regular maintenance and avoiding overloading can help extend its lifespan.
Q: Can an LED driver be repaired?
A: In some cases, minor issues like loose connections or corroded parts can be fixed. However, for significant internal damage, replacing the driver is often the best solution to ensure proper functionality and safety.
Q: What happens if you use the wrong LED driver for your lights?
A: Using the wrong driver can lead to overheating, flickering, or even complete failure of the LEDs. It's essential to match the driver's voltage and current specifications to the needs of your LED lights.
Q: Is it dangerous to use a bad LED driver?
A: Yes, a faulty LED driver can pose safety risks, including fire hazards due to overheating or electrical shocks. It's important to address any issues promptly to avoid potential dangers.


